Witajcie!
Pewnie już pomyśleliście o nadchodzących Walentynkach i upominek dla kochanej osoby kupiony. Jednak trzeba go ładnie zapakować. Jeśli kupiliście drobną biżuterię lub zegarek to ten tutek jest w sam raz dla Was. Otóż dzisiaj pokażę jak zrobić urocze pudełeczko na takie właśnie drobiazgi.
Zatem nie przeciągając zapraszam 😀
Hello everyone!
I'm sure you've already been thinking about the upcoming Valentine's Day and the gift you've purchased for your loved one. However, it's essential to package it nicely. If you've bought a small piece of jewelry or a watch, this tutorial is perfect for you. Today, I'll show you how to make a cute little box for these small treasures.
So, without further ado, let's get started! 😀
Do zrobienia pudełeczka potrzebujemy:
- papier bazowy (użyłam craftowego),
- papier scrapowy (użyłam papieru Lemoncraft z kolekcji Grow old with me )
- wąska wstążka,
- klej, nożyczki, linijka,
- dowolne materiały do ozdobienia pudełka.
To make the little box, you'll need:
- Base paper (I used craft paper),
- Scrap paper (I used Lemoncraft paper from the Grow Old With Me collection),
- Narrow ribbon,
- Glue, scissors, ruler,
- Any materials for decorating the box.
1. Z papieru bazowego wycinamy prostokąt 11,5x10 cm i bigujemy wg schematu. Następnie składamy wzdłuż linii bigowania, a na rogach nacinamy.
1. Cut a rectangle of base paper measuring 11.5x10 cm, and score it according to the diagram. Then fold along the score lines and make cuts at the corners.
2. Wszystkie 4 narożniki smarujemy klejem i sklejamy pudełko.
2. Apply glue to all four corners and assemble the box by sticking them together.
3. Docinamy papier scrapowy do wymiarów każdego boku i dna pudełka (o 2 mm mniejsze niż dany wymiar). Oklejamy pudełko w środku i na zewnątrz dociętym papierem.
3. Trim the scrap paper to the dimensions of each side and the bottom of the box (2 mm smaller than each measurement). Cover the inside and outside of the box with the trimmed paper.
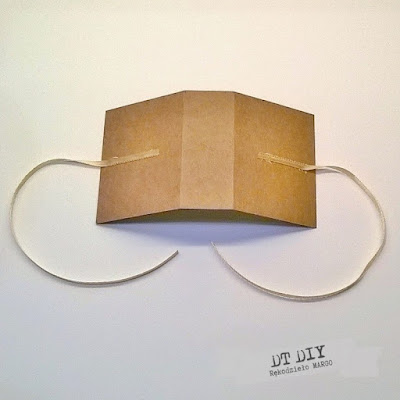
4. Wycinamy z papieru bazowego prostokąt, bigujemy i zaginamy wg schematu.
4. Cut a rectangle from the base paper, score it, and fold it according to the diagram.
5. Przyklejamy wstążkę, która będzie służyła do zawiązania pudełka żeby się nie otwierało.
5. Attach a ribbon that will be used to tie the box and keep it from opening.
6. Docinamy papier scrapowy i oklejamy jak na zdjęciu z obydwu stron.
6. Trim the scrap paper and cover it on both sides, as shown in the picture.
7. Wklejamy wcześniej przygotowane pudełko.
7. Paste the previously prepared box onto the covered scrap paper.
Tak wygląda gotowe pudełeczko.
That's how the finished little box looks like!
Pozostało tylko je ozdobić wg własnego uznania. Na wieczku przykleiłam shaker z cekinami oraz kompozycję kwiatową (kwiaty wykonałam z papieru). Dołożyłam listki, które potraktowałam pastą woskową, sizal, ozdobne kryształki i trochę brokatu. Do środka wkleiłam napis.
All that's left is to decorate it according to your preference. On the lid, I attached a sequin shaker and a floral arrangement (made from paper flowers). I added leaves treated with wax paste, sisal, decorative crystals, and a bit of glitter. Inside, I glued a caption.
Myślę, że pudełeczko jest łatwe wykonaniu. Można robić takie w różnych rozmiarach i na różne okazje. Wydaje mi się, że osobę obdarowaną ucieszy nie tylko jego zawartość, ale też same pudełeczko.
I believe that the little box is easy to make. You can create them in various sizes and for different occasions. It seems to me that the recipient will be pleased not only with its contents but also with the box itself.
Pozdrawiam wszystkich cieplutko i zapraszam do tworzenia 😀
Warm regards to everyone, and I invite you to get creative! 😀
Małgorzata z Rękodzieło Margo


To pudełko jest z tych- ojej, nie mam w co zapakować prezentu. Rach ciach i gotowe. Ozdobienie trwa troszkę dłużej :-)
ReplyDeleteTak, uniwersalne. Zdobienie zawsze można zrobić nieco prostsze, bo na shaker trzeba troszkę czasu poświęcić.
Delete