Cześć, jak się macie? 😀 // Hello, how are You?
Mam dla Was kolorowy sposób na spędzenie szaroburych wieczorów - złapmy za koraliki, dodajmy do nich nieco sznurka i wyczarujmy sobie nowe bransoletki! Co Wy na to? 😄
I have a colorful way for you to spend gray and gray evenings - let's grab the beads, add some string to them and make some new bracelets! What do you say?
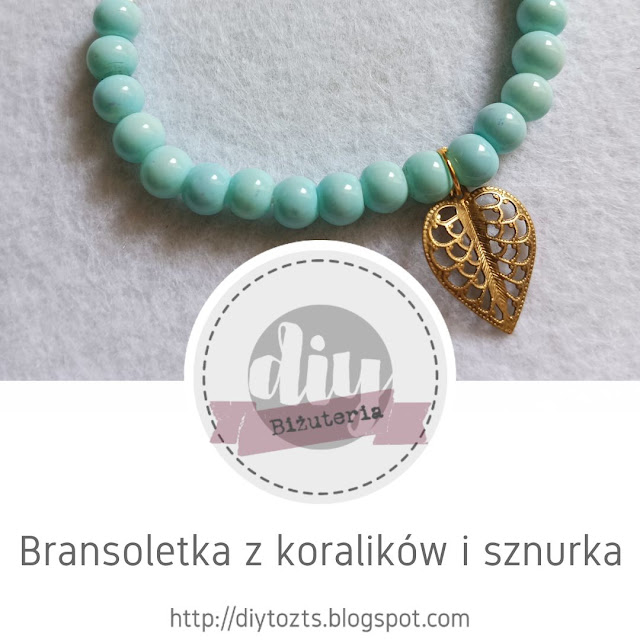
Bransoletka z koralików i sznurka - co będzie potrzebne:
Bead and string bracelet - what you will need:
- oczywiście sznurek w wybranym kolorze,
- koraliki - i tutaj uwaga - ich otwór musi być na tyle duży, by dało się przewlec przez nie sznurek,
- zawieszka i kółeczko do jej przywieszenia (możecie zrobić też bransoletkę bez zawieszki),
- nożyczki,
- sekundowy klej,
- zapalniczka (do przypalenia końców sznurka),
- szczypce biżuteryjne (opcjonalnie).
- of course, string in the selected color,
- beads - their hole must be large enough to allow the string to be threaded through them,
- a pendant and a ring to hang it on (you can also make a bracelet without a pendant),
- scissors,
- second glue,
- lighter (to burn the ends of the string),
- jewelry pliers (optional).
Jak zrobić bransoletkę z koralików i sznurka - tutorial
How to make a bracelet with beads and string - tutorial
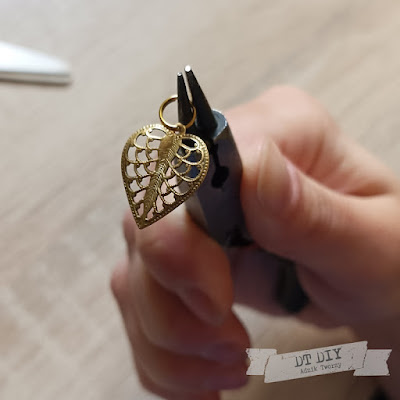
1. Jeżeli chcecie zawiesić na swojej bransoletce zawieszkę - możecie zacząć od przymocowania do niej kółeczka. Dzięki temu łatwiej będzie zawiesić ozdóbkę na sznurku.
If you want to hang a pendant on your bracelet, you can start by attaching a ring to it. This will make it easier to hang the ornament on the string.
2. Następnie łapiemy za sznurek i lekko przypalamy jego końce, żeby się nie strzępiły (ten patent sprawdza się w przypadku sznurków sztucznych, np. nylonowych albo satynowych).
Then we grab the string and lightly burn its ends so that they do not fray (this method works well with strings made of nylon or satin).
3. Nawlekamy koraliki na sznurek.
Thread the beads onto the string.
4. Gdy połowa koralików jest już na sznurku - nakładamy zawieszkę (jeśli chcemy) i dokładamy resztę koralików.
When half of the beads are already on the string, we put on the pendant (if we want) and add the rest of the beads.
5. Zsuwamy wszystkie koraliki tak, by znalazły się na środku sznurka, a końce sznurka pozostały wolne.
We slide all the beads so that they are in the middle of the string and the ends of the string are free.
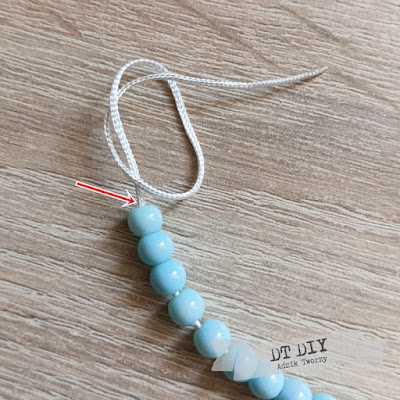
6. Robimy supełki tuż przy koralikach (jak na poniższym zdjęciu).
We make knots right next to the beads (as in the photo below).
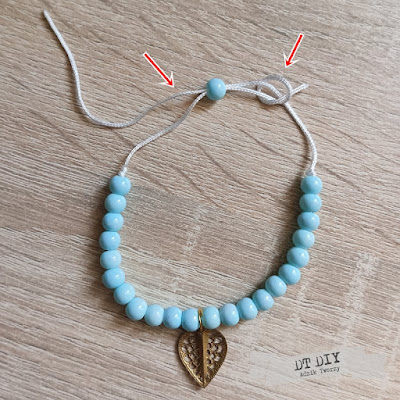
7. Teraz zrobimy regulowane zapięcie.
Ja postanowiłam nieco udekorować ten fragment, używając dodatkowego koralika (nawlekłam go na oba końce sznurka, jak na zdjęciu poniżej).
Jest to opcjonalne.
Now we will make an adjustable clasp.
I decided to decorate this fragment a bit, using an additional bead (I threaded it on both ends of the string, as in the photo below).
This is optional.
Łapiemy za jeden koniec sznurka i robimy nim supeł wokół drugiego sznurka.
Po przeciwnej stronie powtarzamy czynność.
We grab one end of the string and make a knot around the other string.
We repeat the action on the opposite side.
Poniżej zaznaczyłam, gdzie powinny znaleźć się supełki - będą się one przesuwać po "bazowym" sznurku i tworzyć regulację całej bransoletki.
Below I marked where the knots should be located - they will slide along the "base" string and adjust the entire bracelet.
8. Supełki, które tworzą regulację, zabezpieczamy dosłownie ODROBINĄ kleju i staramy się wprawić regulację w ruch (to uchroni supełki przed całkowitym przyklejeniem się do bazy bransoletki 😉).
Secure the knots that make up the adjustment with just a LITTLE bit of glue and try to set the adjustment in motion (this will prevent the knots from completely sticking to the bracelet base).
9. Odcinamy nadmiar sznurka przy supłach.
Uwaga - polecam zostawić ok. 0,5-1 cm końcówkę sznurka przy każdym supełku (ja za bardzo zaszalałam z cięciem, zostały mi same supełki 😐).
We cut off the excess string at the knots.
I recommend leaving something about 0.5-1 cm string at each knot (I went too crazy with the cutting, I only had knots).
10. Końce skróconych sznurków możemy przypalić zapalniczką.
We can burn the ends of the shortened strings with a lighter.
Nie pozostaje już nic więcej, jak tylko cieszyć się z nowej bransoletki!
There is nothing left to do but enjoy your new bracelet!
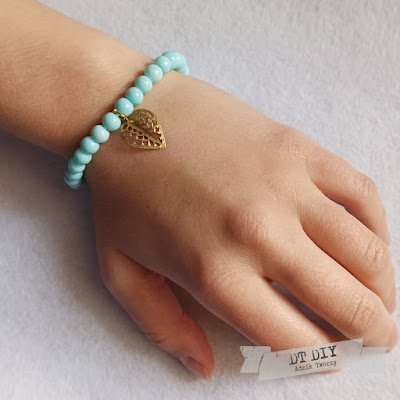
Szczerze się Wam przyznam, że to moja stara-odnowiona bransoletka. Wcześniejszy, bawełniany sznurek mocno się zużył od częstego noszenia, dlatego tym razem postanowiłam spróbować ze sznurkiem nylonowym.
I can honestly tell you that this is my old, refreshed bracelet. The previous cotton string was worn out from frequent wear, so this time I decided to try a nylon string.
Zrobiłam też regulację jak w rzemyku, choć wcześniej miałam ruchomą regulację na supełek baryłkowy. U siebie na blogu mam kilka instrukcji na różne sznurkowe zapięcia-regulacje w biżuterii - możecie w swojej bransoletce wykorzystać inny sposób regulacji, np. plecione makramowe zapięcie.
Który typ jest dla Was najwygodniejszy? 😀
Który typ jest dla Was najwygodniejszy? 😀
I also made the adjustment like a strap, although previously I had a movable adjustment using a barrel knot. I have several instructions on my blog for various string clasps and adjustments in jewelry - you can use a different method of adjustment in your bracelet, e.g. a braided macrame clasp.
Which type is the most comfortable for you?
Przyjemnego koralikowania! //Have a nice beading time!
Adrianna - Adzik tworzy








Bardzo dobry pomysł. Mam takie rozsypane koraliki... spróbuję zrobić :)
ReplyDeleteSuper! :D Będzie mi bardzo miło, jeśli zechcesz pochwalić się gotową biżuterią. :)
Delete