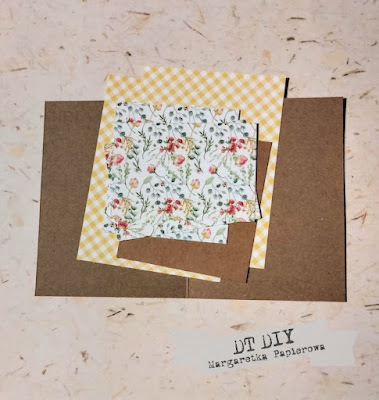
POZIOM/LEVEL : ŁATWY/EASY
Witajcie! // Hello!
Dzisiaj przychodzę z pomysłem na karteczkę z ruchomą klapką :miejscem na zdjęcie, obrazek, życzenia, która podnosi się po otwarciu .
today i come with an iea for card with a movable flap: a place for a photo , an image, and wishes , that lifts up when opened.
Do jej zrobienia potrzebujemy:
To make it, you need
arkusz papieru bazowego, papier ozdobny do oklejenia stron, nożyczki , klej, dodatki do ozdobienia
- a sheet of plain paper for the base
-decorative paper to cover the card,
- scissors
-glue
-embellishments
z papieru bazowego przycinamy kartkę o wymiarach 20 x 13, bigujemy w połowie, aby otrzymać złożona kartkę o wymiarach 10 x 13cm,
a z paska o wymiarach 12x4cm tworzymy mechanizm zgodnie z dolnym rysunkiem :
cutting the base paper - start with a base paper measuring 20x13cm, fold it in half to create a folded card with dimensions 10x13cm,
creating the mechanism from a strip- take a strip of paper measuring 12x4cm, follow the diagram below to create the mechanism
Następnie oklejamy naszą bazę :
także wewnątrz
glu the base paper both inside and outside
przygotowany i zbigowany mechanizm pomocniczy wygląda tak:
prepare the auxiliary mechanism (pre-folded) as follows:
wąski 1cm pasek smarujemy klejem i przyklejamy do prawego skrzydełka kartki ok 2cm od góry ,
apply glue to a narrow 1cm strip
tak aby górny brzeg mechanizmu pokrywał się z górnym brzegiem kartki.
attach it to the right wing of the card, approximately 2cm from the top, ensuring that the upper edge of the mechanism aligns with the lines intersect matches that card's crease
pamiętajcie o tym, żeby punkt w którym spotykają się wszystkie linie bigowania pokrywał się z bigiem kartki
make sure the point where all the crease lines intersect matches the card's crease
większy trójkącik na mechanizmie możemy okleić
you can also glue a larger teiangle onto the mechanism
teraz smarujemy klejem mały trójkącik , układamy mechanizm tak jak na zdjęciu i zmykamy karteczkę
przyciskamy czymś ciężkim i pozostawiamy do wyschnięcia
apply glue to a small triangle,arrange the mechanism as shown in the photo and close the card, press it down with something heavy and let it dry.
tak wygląda mechanizm po otwarciu kartki
after openning the card you'll see the mechanism
przygotowujemy sobie karteczkę która będzie podnoszona tym mechanizmem , tutaj trzeba trochę dostosować wymiary do tego jak nam wyszła kartka z mechanizmem. u mnie ma 9x 9 cm , ale lepiej zmniejszyć jej wymiary, szczególnie wysokość, żeby lżej się zamykała.
podnoszona kartkę wkleiłam w ten sposób: - naniosłam klej na skrzydełko, przyłożyłam kartkę na płasko do brzegu posmarowanego skrzydełka i zamknęłam całość. delikatnie otwierając poprawiłam ,żeby ładniej leżała i zamknęłam , pozostawiając przyciśniętą, do wyschnięcia.
prepare a smaller card that will be lifted by this mechanism, adjust its dimensions based on your mechanism.For example is 9x9cm , but consider reducting the height for smoother closure
glu a lifted card as follows: apply glue to the wing, lay the card flat against the glued wing and close it. Adjust as needed for a neat fit and leave it pressed until dry
Tak wygląda nasza złożona , ozdobiona grafiką z Przez Okienko , karteczka
your completed decorated card features artwork from "Przez okienko"
a tak środek, po otwarciu
when opened it reveals this center
miłego tworzenia!


No comments:
Post a Comment