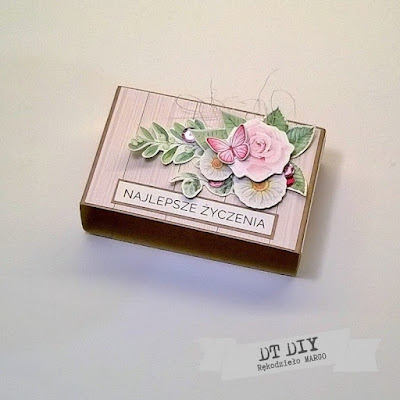
Witajcie! Hello everyone!
Powoli zbliża się Dzień Babci i Dziadka. Z pewnością już myślicie o upominku dla seniorów.
Nic bardziej nie ucieszy jak drobny prezent własnoręcznie zrobiony.
Zapraszam na tutorial, w którym pokażę jak zrobić czekoladownik na 2 czekolady 100g.
Grandparents' Day is slowly approaching. Surely, you're already thinking about a gift for the seniors.
There's nothing more delightful than a small, handmade present.
Join me for a tutorial where I'll demonstrate how to make a chocolate box for two 100g bars.
Do zrobienia czekoladownika potrzebujemy:
- 2 arkusze papieru A4 na bazę,
- pasek papieru bazowego na opaskę(5,5x24,4cm),
- papier scrapowy do oklejenia bazy,
- klej, nożyczki, dziurkacz koło oraz do zaokrąglania rogów,
- do bigowania (tablica lub linijka i wypisany długopis),
- kawałek sznureczka,
- elementy do ozdobienia czekoladownika.
To make the chocolate box, you'll need:
- 2 sheets of A4 paper for the base,
- a strip of base paper for the band (5.5x24.4cm),
- scrap paper for covering the base,
- glue, scissors, a hole punch (circular and corner rounding),
- a scoring tool (scoring board or a ruler and a pen),
- a piece of twine or string,
- decorations to adorn the chocolate box.
Wykonanie:
1. Najpierw przygotowujemy bazę.
Użyłam papieru craftowego 250g. Wycinamy z papieru bazowego wszystkie 4 części i bigujemy wg poniższego rysunku. Wszystkie wymiary to odległości pomiędzy liniami bigowania podane w centymetrach. Następnie wycinamy nożyczkami niepotrzebne części i zaginamy wzdłuż linii bigowania. Bazę na opaskę proponuję wyciąć na końcu gdy czekoladownik będzie gotowy. Jej wymiary są orientacyjne i mogą się minimalnie różnić w zależności od tego jakiego użyjemy papieru. Opaska nie może być luźna.
Execution:
1. Start by preparing the base.
I used 250g craft paper. Cut out all 4 parts from the base paper and score along the lines according to the diagram below. All measurements represent the distances between the scoring lines in centimeters. Then, trim off the unnecessary parts with scissors and fold along the scored lines. It's suggested to cut out the band for the box after the chocolate box is assembled. Its dimensions are approximate and might slightly vary depending on the paper used. The band should not be loose.
3. Doklejamy do części 2 klapkę (3), a później smarujemy klejem boki (te 0,8 cm) i sklejamy całość.
3. Attach flap 3 to part 2, then apply glue to the sides (those 0.8 cm sections) and stick the whole thing together.
Gotowa sklejona baza wygląda tak.
The completed glued base looks like this.
Mam nadzieję, że zaciekawiłam Was takim nietypowym czekoladownikiem.
W swojej pracy wykorzystałam papiery Lemoncraft z kolekcji Happiness
Życzę miłego cięcia i klejenia. Bawcie się dobrze!
Pozdrawiam serdecznie 😀
I hope I've intrigued you with this unique chocolate box.
In my project, I used Lemoncraft papers from the Happiness collection.
Wishing you a pleasant time cutting and gluing. Have fun!
Warm regards! 😊
Małgorzata z Rękodzieło Margo


Świetny pomysł. Piękny czekoladnik. Kusi 😀
ReplyDeleteDziękuję bardzo :) Skoro kusi, to trzeba spróbować.
DeleteSuper pomysł i jakie ładne wykonanie :)
ReplyDeleteŚlicznie dziękuję :) Bardzo mi miło.
DeleteSuper pomysł, świetny będzie taki prezent dla Babci i Dziadka jednocześnie
ReplyDeletePozdrawiam
Pięknie dziękuję :) Taki był zamiar żeby był jednocześnie dla babci i dziadka.
DeleteŚwietny projekt.
ReplyDeleteDziękuję :) Miło mi, że się podoba :)
Delete